Installing and Configuring Klipper for Multiple 3D Printers
1.Install a clean version of the Klipper system image first;
2.Use CB1 to run this system card, then use the customized Kiauh script to install Klipper,
send the command:
wait a while and you will be able to access the Main Menu soon:

3.Enter the Main Menu, send the 1 (Install) command;
Send 1 again, select Install Klipper;
Send 1 again, select the Klipper version, and then prompt the number to be installed. If using 3 units, enter 3, press Enter, send y, and then name the three machines respectively. After the naming is complete, press Enter, it will enter the Klipper installation stage.
Wait for the installation to complete, as shown in the following figure:

4.After completing step 3, it will return to the Installation Menu, then send command 2 to install Moonraker, the number is also 3, by default it will be consistent with the number in step 3, just click Enter, then send command y to confirm, and wait for the installation to complete;
The completion of the installation is like this, it is best to remember the address framed in red. This will be the address for Moonraker to add the printer, usually 7125 7126 7127

5.After completing step 4, send command 3/4 to install the interface plug-in you like.
In the middle, the confirmation command will pop up. Just send y and wait for the installation to complete;

6.After completing step 5, send command 5 to install KlipperScreen and wait for the installation to complete;
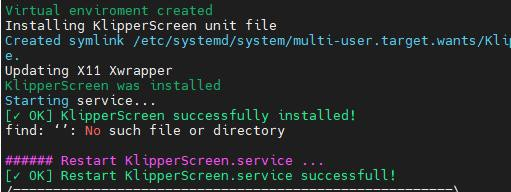
7.After everything is OK, send command B to return to the Main Menu. The above options in the Main Menu will appear an "Installed" text, which means the installation was successful;

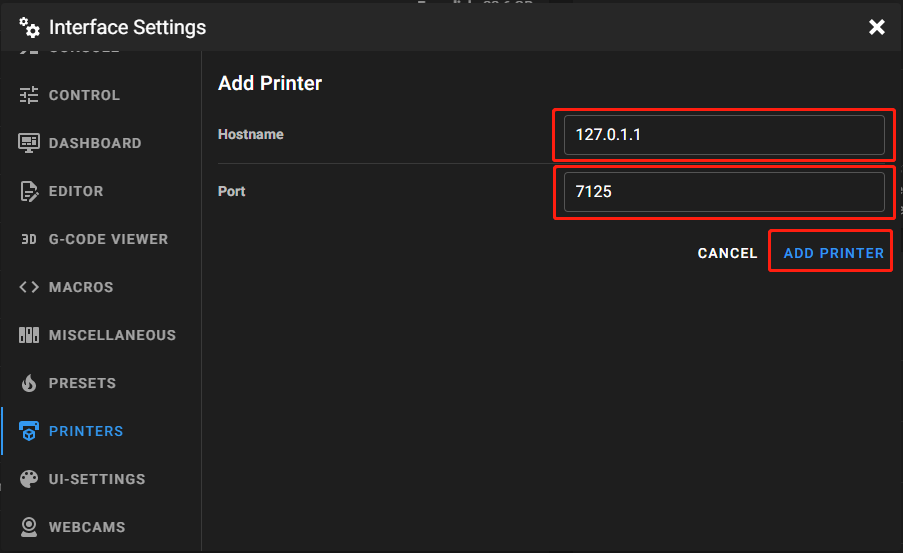
9.After completing the above steps, add a printer on the web page:

Enter the IP of CB1 and the port number of the machine (step 4), then click Add Printer 1:
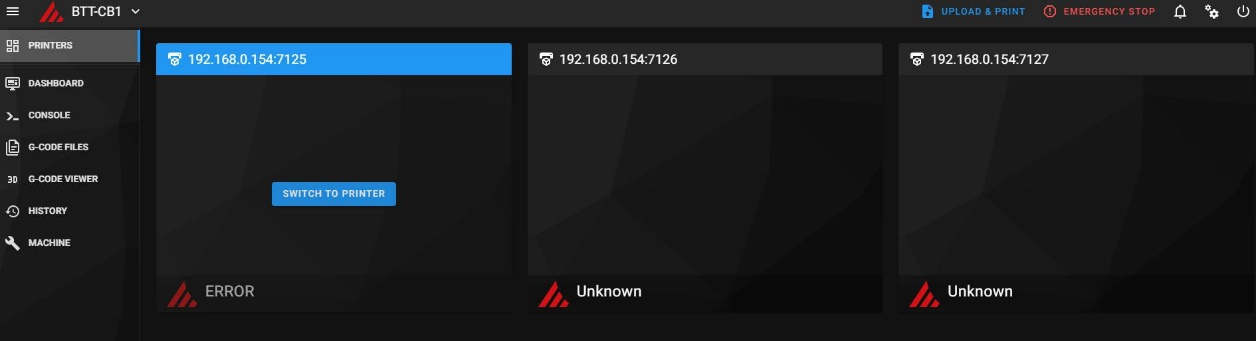
Printers 2 and 3 have the same settings, you need to change the port number to 7126 and 7127, as shown in the figure:
9.Add the corresponding configuration file for each of the three machines. For example, the Printer 1, click the blue command line (SWITCH TO PRINTER), then add the corresponding printer.cfg file (If there is no mainsail.cfg file, it is recommended to upload one as well. The [virtual_sdcard] path in this file might be different, and you can make adjustments based on the notification bell in the top right corner of the webpage.) in the MACHINE option, and then click FIRMWARE RESTART as shown in the figure:

With this, Printer 1 is set up and you can use the control interface to control Printer 1


Similarly, Printers 2 and 3 are also set up and switched in this way.