Software Configuration
· System Settings (CM4)
· USB 2.0 Hub Ports
M4P is designed with a USB 2.0 Hub, in order to save power consumption, the USB port of CM4 is disabled by default. If you want to enable it, you need to add the following content to the config.txt file:
· DSI1 Display Interface
The default display interface is HDMI. The onboard DSI port of M4P uses the DSI1 interface. You need to download the DSI1 driver and enter the following sentence in the command line:
After downloading this driver and restarting, the screen of DSI1 will work normally. If you want to use the HDMI interface, you need to delete the downloaded /boot/dt-blob.bin driver and restart, then the HDMI can output normally.
· CSI1 Camera
The DSI1 driver downloaded in 4.4.2 DSI1 Display Interface also includes the CSI1 driver. If you just want to install the CSI1 driver, not DSI1, please find the driver you want to use at https://datasheets.raspberrypi.com/licence.html and download it in the boot folder of CM4 and rename it to dt-blob.bin, and then refer to the settings here. https://projects.raspberrypi.org/en/projects/getting-started-with-picamera/
· WIFI Setting
Note: This step can be skipped if you are using a network cable connection.CB1 cannot directly use the Raspberry Pi Imager to set the WiFi name and password like CM4. After the OS image writing is completed, the MicroSD card will have a FAT32 partition recognized by the computer, find"system.cfg"
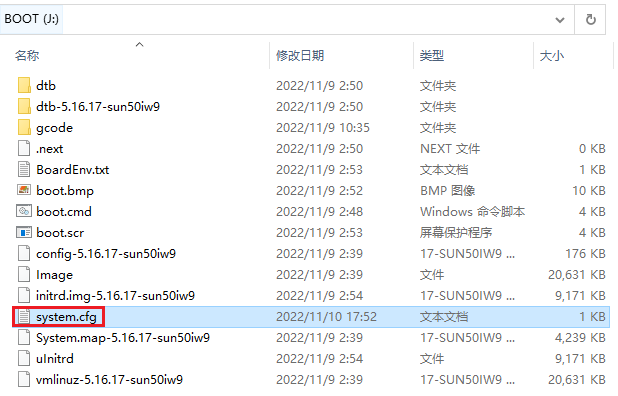
Open it with Notepad, replace WIFI-SSID with your WiFi name, and PASSWORD with your password.

· Configure the motherboard
· ssh connect to device
-
Install the ssh application Mobaxterm: https://mobaxterm.mobatek.net/downloadhome-edition.html
-
Insert Micro SD card to M4P, wait for system to load after power on, aprox. 1-2min
-
The device will automatically be assigned a IP address after successfully connected to the network
-
Find the device IP address in your router page
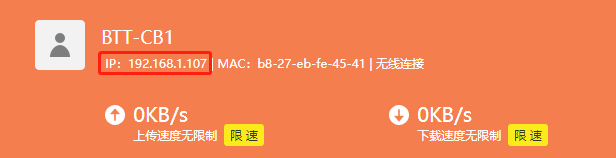
- Or use the https://angryip.org/ tool,scan all IP address in the current network organize by names, findthe IP named Fluidd, Mailsail (CM4) or Hurakan (CB1) like shown below

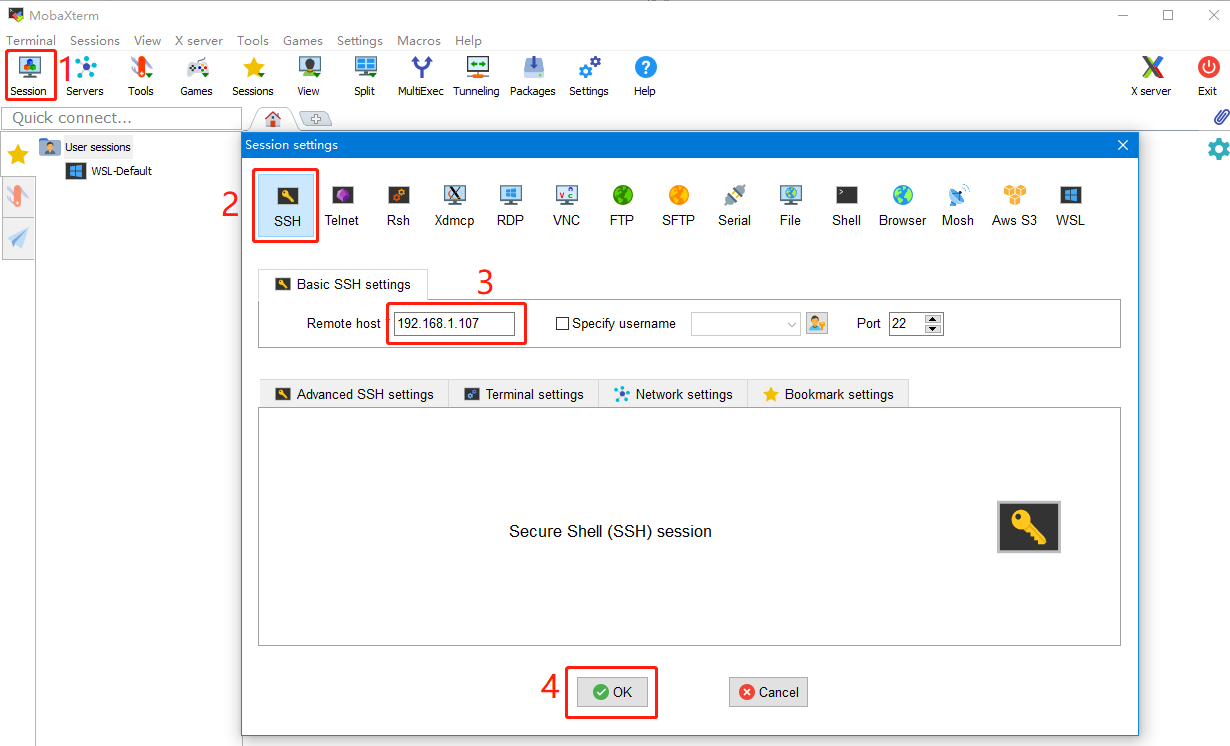
- Open Mobaxtermand click “Session”, and click “SSH”,inset the device IP into Remote host and click “OK” (note: your computer and the device needs to be in the same network)
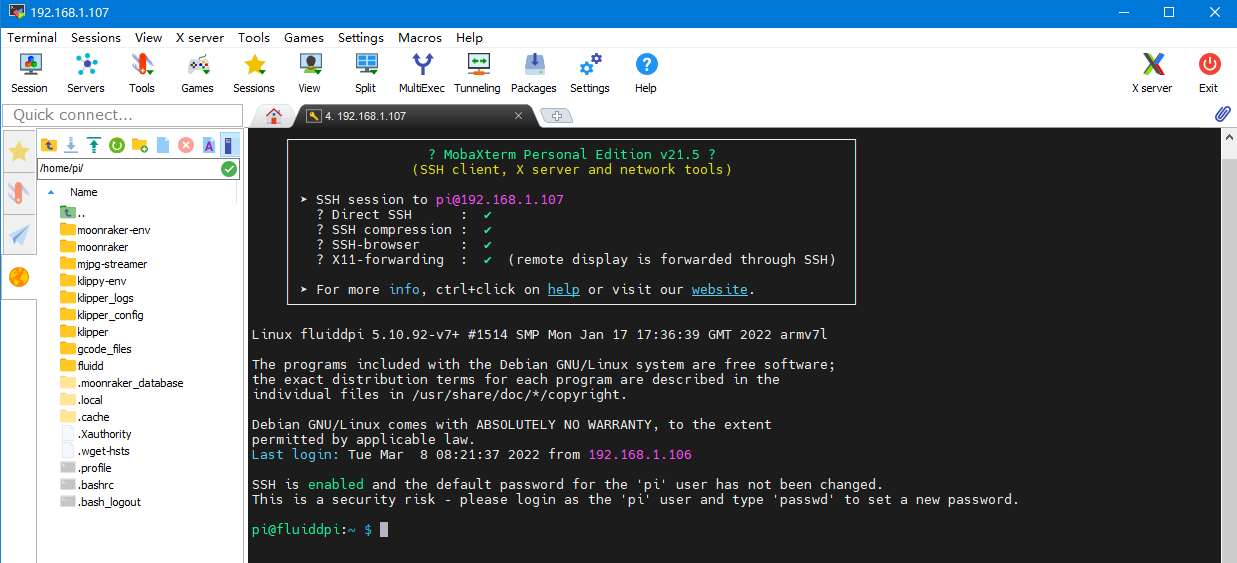
- Input the login name and password to enter the SSH terminal interface CM4: login as: pi password: raspberry CB1: login as: biqu password: biqu
· Compile firmware
-
After ssh successfully connected to the device, enter in terminal:
Compile with the configuration shown below(if the options below is not available, please update you Klipper source code to the newest version)
- [*] Enable extra low-level configuration options
- Micro-controller Architecture (STMicroelectronics STM32) --->
- Processor model (STM32G0B1) --->
- Bootloader offset (8KiB bootloader) --->
- Clock Reference (8 MHz crystal) --->
- Communication interface (USB (on PA11/PA12)) --->
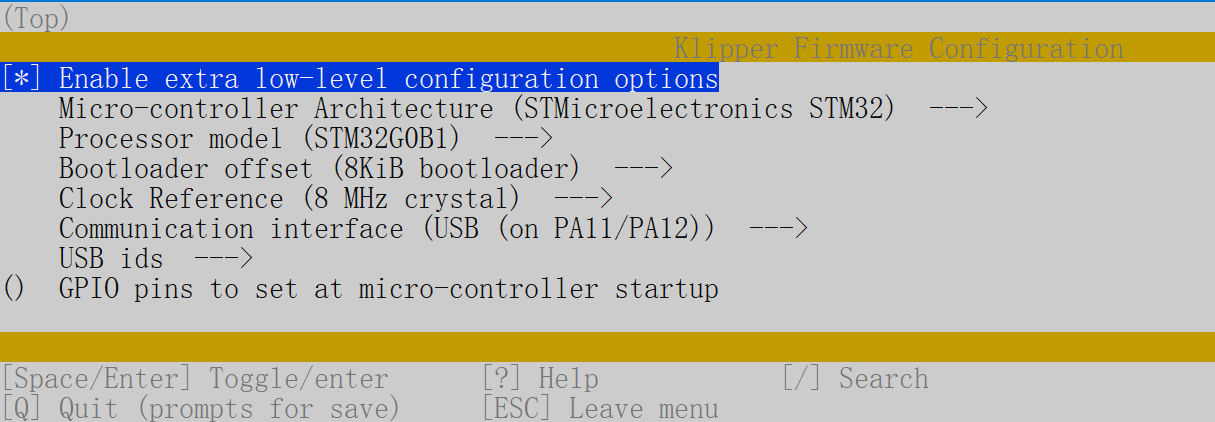
- Run make to compile firmware,”klipper.bin” file will be generated in home/pi/kliper/out folder when make is finished, download it onto your computer using the ssh application.
· Firmware update
· Update using SD Card
-
Rename klipper.bin to ”firmware.bin”, Copy to the SD card root directory, insert the SD card into the SD card slot of the M4P, click the “reset” button or power on again. The firmware will be updated automatically. After the update, the "firmware.bin" in the SD card will be renamed as "FIRMWARE.CUR".
-
Enter: ls /dev/serial/by-id/ in terminal to check motherboad ID to confirm whether firmware is updated successfully like showm below.

· Update using DFU
If the MCU klipper device ID can be found by ls /dev/serial/by-id/, we can input:
to update firmware (NOTE: Replace /dev/serial/by-id/xxx with the actual ID found in the previous step)
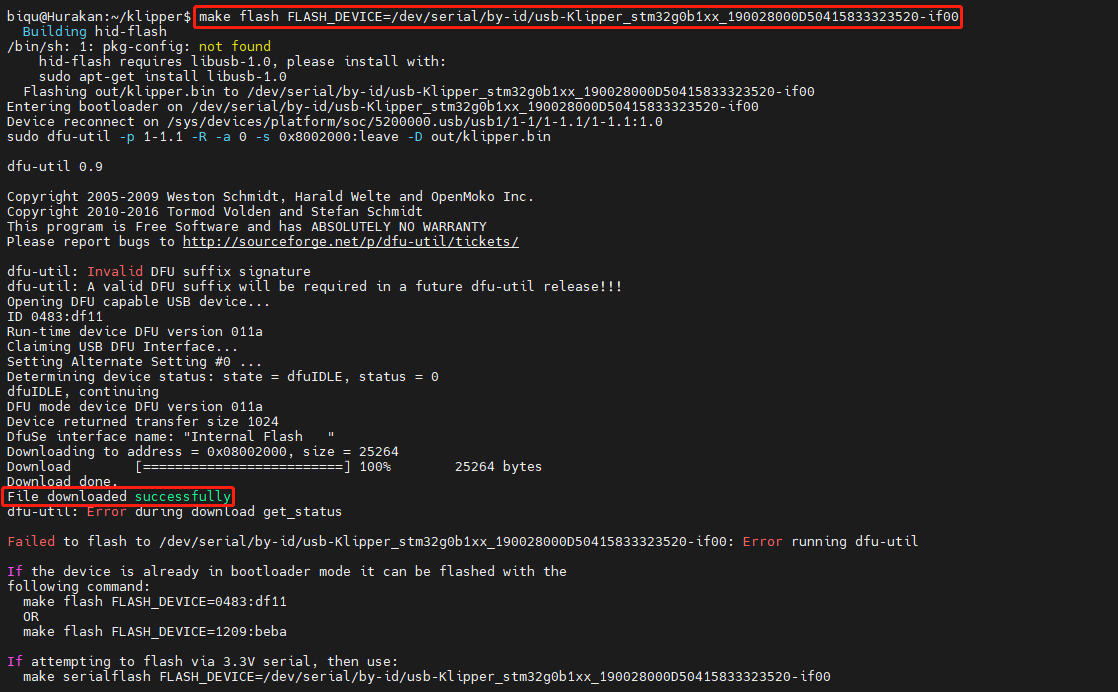
There will be an error message “dfu-util: Error during download get_status” after update. Just ignore it.
· Configure Klipper
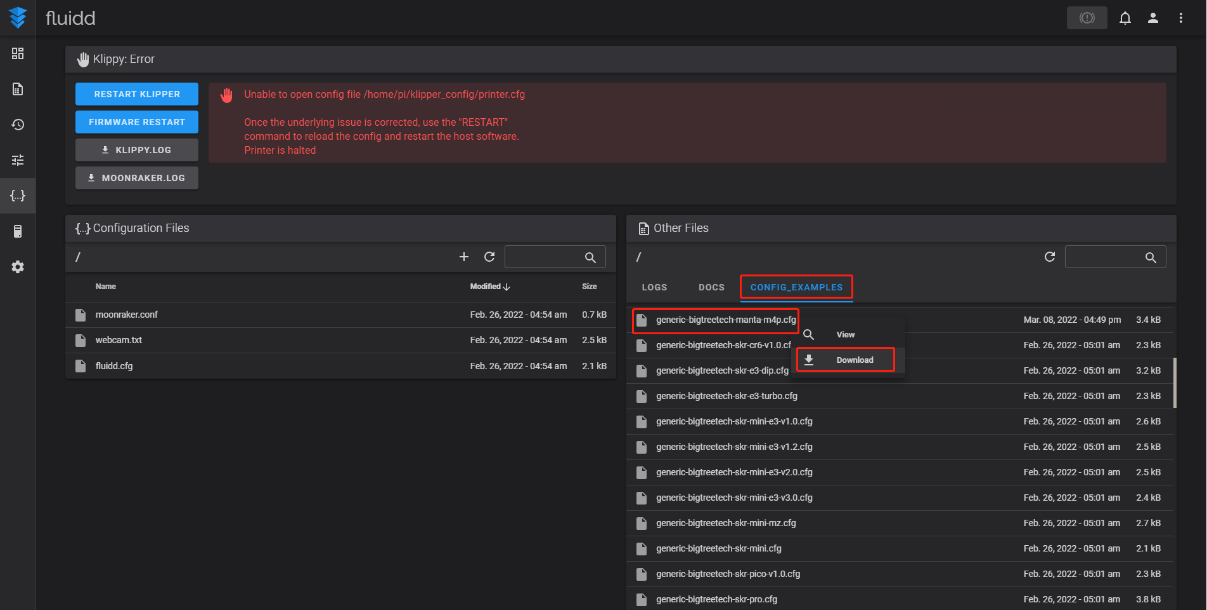
- Enter your device IP address into your browser to open the webUI,find the reference config for motherboard in the directory shown below,if there is no such config available, update your klipper source code to the newest version or download from github: https://github.com/bigtreetech/Manta-M4P
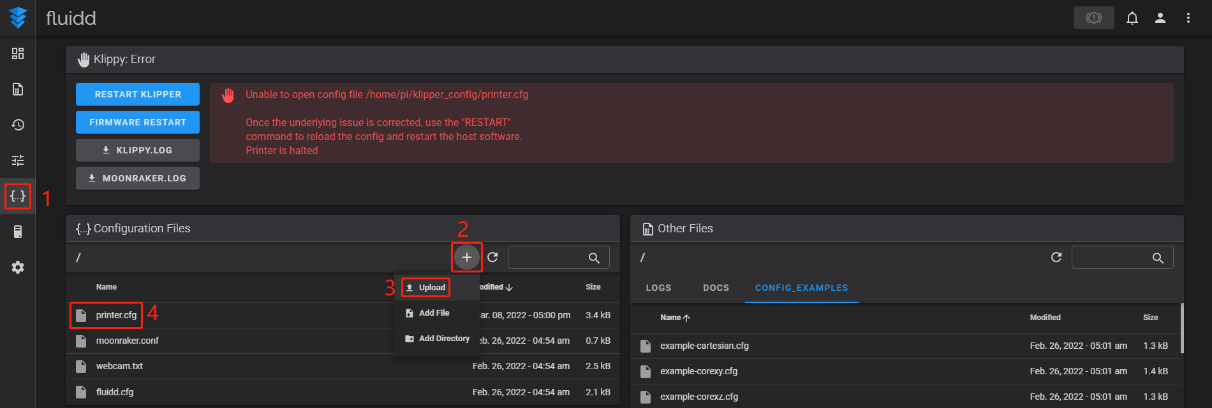
- Upload your finished config file into Configuration Files, and rename to “printer.cfg”
- Insert the correct motherboad ID

Refer to https://www.klipper3d.org/Overview.html for detailed configuration guide according to your machine type.