Panda Lux
Product Link
https://biqu.equipment/products/panda-lux-led-upgrade-kit
Product Profile
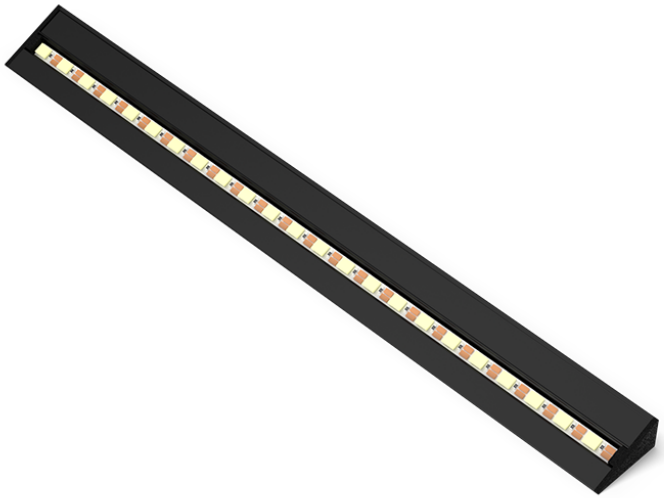
The Panda Lux is a high-brightness LED light bar specially designed for Bambu Lab P1/X1 series printers. It provides bright illumination for the print area, allowing users to easily monitor the printing process and quickly identify any issues.
Feature Highlight
- High-Level Brightness: 31 LEDs and 6000K color temperature provide clear illumination for the print area.
- Front-Facing Illumination: Front-facing design avoids direct light into the eyes, reducing glare and protecting eyesight.
- Magnetic Installation: Easy to install with magnetic mounting, no tools required.
- Original Screen Control: Control the Panda Lux via the printer's original screen for seamless integration.
- Aluminum Alloy Housing: High-quality aluminum alloy housing ensures efficient heat dissipation and extends the LED light's lifespan.
- Compatibility: Compatible with Bambu Lab P1/X1 series printers.
Specification
| Voltage | 5V |
|---|---|
| Color Temperature | Pure White, 6000K |
| Waterproof | No |
| Lifespan | Up To 36,000 Hours |
| Cable Length | 100mm |
| Compatibility | For Bambu Lab X1/P1 Series Printers |
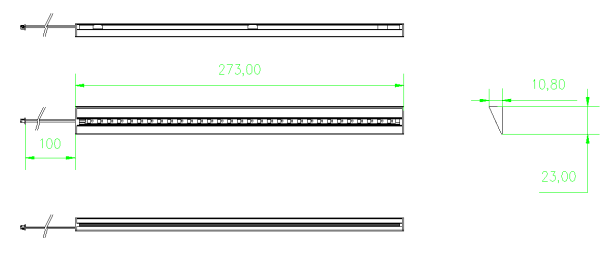
Dimensions
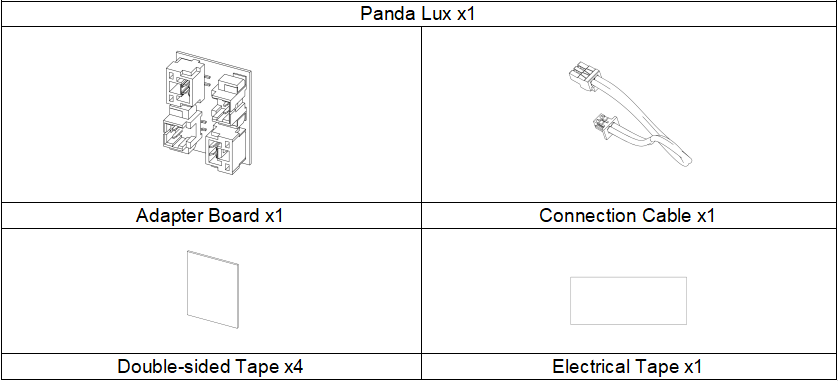
Packaging List
Installation Instructions
The following instructions use the Bambu Lab P1P as an example.
Step 1: Attach the Panda Lux to the underside of the printer's front door frame, centering it in place.
*The Panda Lux has built-in magnets that allow for easy installation. For additional reinforcement, double-sided adhesive tapes are included in the package but are not required.

Step 2: Remove the protective cover off of the AP board if you are installing on a P1 printer (USB port PCB) or open the plastic cover on the right side of the frame if you are installing on a X1 printer.
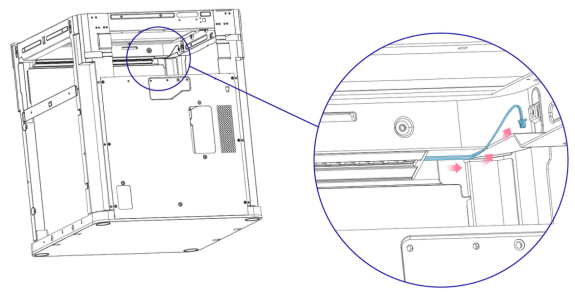
Step 3: As shown in the image, route the Panda Lux cable along the edge seam to the top.
*For additional stability to prevent the cable from moving, use the electrical tape provided in the package to secure the cable firmly to the door frame.
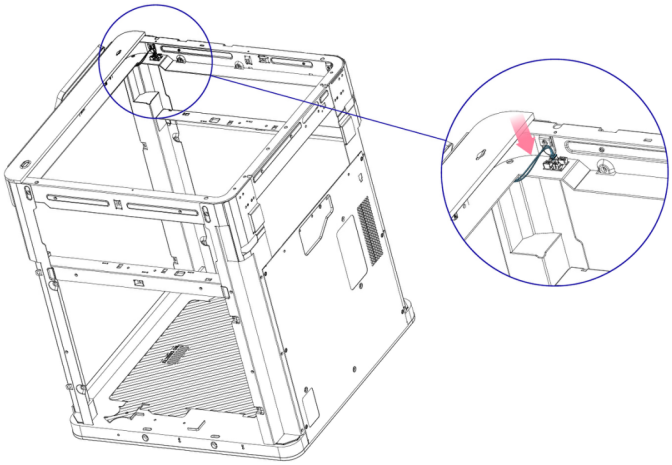
Step 4: Disconnect the stock light bar connector from the AP board.

Step 5: Connect the Panda Lux cable connector on the adapter board.
Step 6: Peel off the double-sided tape on the bottom of the adapter board and stick it on a suitable location.
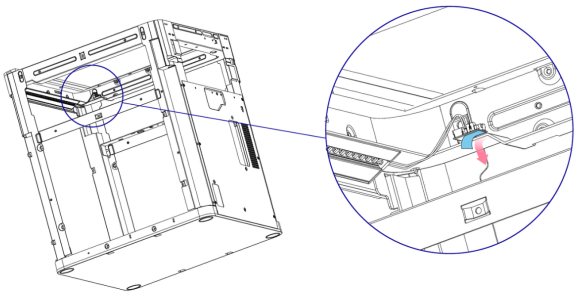
Step 7: Insert one end of the connection cable into the AP board's stock light bar port, and insert the other end of the connection cable into the adapter board.
Note: The stock lightbar connector location on X1 series is on the left side of the frame behind the plastic cover.

Step 8: Install the protective cover back onto the AP board (close the plastic cover for X1 printers).
Product Purchase Link:
https://biqu.equipment/products/panda-lux-led-upgrade-kit
If you experience any issues with this product, please contact us and submit a support ticket.
https://biqu3d.com/pages/submit-a-ticket
Navigation:
BIQU Official Website: http://biqu3d.com
BIGTREETECH Official Website: http://bigtree-tech.com
Online Store: https://biqu.equipment
Community: https://community.biqu3d.com